透過 Kubernetes Deployments 實現滾動升級
學習如何利用 Kubernetes Deployment 進行滾動升級

文章目錄
在新版的 Kubernetes 官方推薦使用 Deployment 來取代 Replication Controller(rc),兩者間主要相同點包括確保處在服務狀態的 Pod 數量(replicas)能滿足先前所設定的值以及支援滾動升級(Rolling update),前者額外支援回滾(Roll back)的機制,因此接下來會介紹如何利用 Deployment 來進行滾動升級。

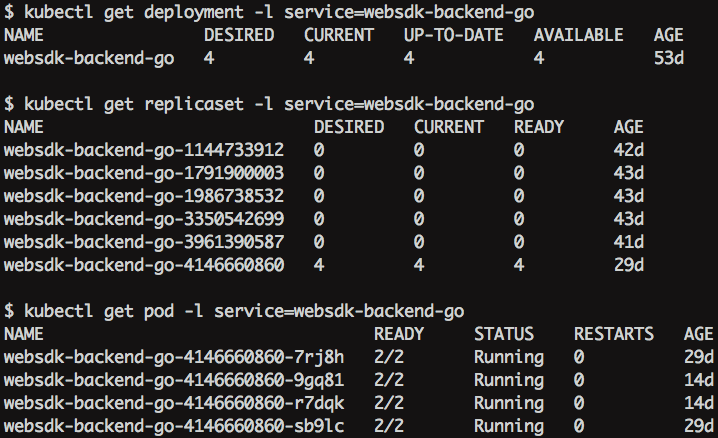
從圖中可以看到一個 Deployment 掌管一或多個 ReplicaSet,而一個 ReplicaSet 掌管一或多個 Pod。
讓 Deployment 控管多個 ReplicaSet 的主要原因在於支援回滾機制 (Rollback)。每當部署新的 Deployment 設定時,Kubernetes 會依據新設定重新生成一個 ReplicaSet 並保留舊設定,未來有需要的話就能直接利用舊的 ReplicaSet 回滾至先前狀態。必須注意的是同時間只會有一個 ReplicaSet 生效 (DESIRED > 0)。
首先我們利用下面的 deployment yaml 檔 nginx.yaml 來建立一個需要 3 個 pods 的 deployment
apiVersion: extensions/v1beta1
kind: Deployment
metadata:
  name: nginx
spec:
  replicas: 3
  template:
    metadata:
      labels:
        service: http-server
    spec:
      containers:
      - name: nginx
        image: nginx:1.10.2
        imagePullPolicy: IfNotPresent
        ports:
        - containerPort: 80
你可以使用 kubectl create 或 kubectl apply 去建立 nginx deployment
$ kubectl create -f nginx.yaml
deployment "nginx" created
透過 kubectl 可以看到目前該 nginx deployment 的部署情況
$ kubectl get deployment
NAME                DESIRED   CURRENT   UP-TO-DATE   AVAILABLE   AGE
nginx               3         3         3            3           8m
從 Deployment、ReplicaSet、Pod 的命名可以看出之前所說的這三者間的階層關係
└─ Deployment: <name>
   └─ ReplicaSet: <name>-<rs>
       └─ Pod: <name>-<rs>-<randomString>
Kubernetes 自動產生的 replicaset
$ kubectl get rs
NAME                DESIRED   CURRENT   AGE
nginx-3322722759    3         3         8m
由該 replicaset 產生的 pod
$ kubectl get pod -l "service in (http-server)"
NAME                     READY     STATUS    RESTARTS   AGE
nginx-3322722759-7vp34   1/1       Running   0          14m
nginx-3322722759-ip5w2   1/1       Running   0          14m
nginx-3322722759-q97b7   1/1       Running   0          14m
為了讓 Kubernetes 能夠按照我們所想的方式來進行滾動升級,首先我們必須在剛剛的 yaml 檔內的 spec 加入相關升級策略設定
minReadySeconds: 5
strategy:
  # indicate which strategy we want for rolling update
  type: RollingUpdate
  rollingUpdate:
    maxSurge: 1
    maxUnavailable: 1
- minReadySeconds:
- 容器內應用程式的啟動時間,Kubernetes 會等待設定的時間後才繼續進行升級流程
- 如果沒有此欄位的話,Kubernetes 會假設該容器一開完後即可進行服務
- 若未設定此欄位,在某些極端情況下可能會造成服務無法正常運作(新誕生的 pod 尚未進入可服務階段)
- maxSurge:
- 升級過程中最多可以比原先設定所多出的 pod 數量
- 此欄位可以為固定值或是比例(%)
- ex. maxSurge: 1、replicas: 5,代表 Kubernetes 會先開好 1 個新 pod 後才刪掉一個舊的 pod,整個升級過程中最多會有 5+1 個 pod
- maxUnavailable:
- 最多可以有幾個 pod 處在無法服務的狀態
- 與
maxSurge不可同時為零 (當maxSurge不為零時,此欄位可為零) - ex. maxUnavailable: 1,代表 Kubernetes 整個升級過程中最多會有 1 個 pod 處在無法服務的狀態
加完相關設定後 nginx.yaml 會長下面這個樣子
apiVersion: extensions/v1beta1
kind: Deployment
metadata:
  name: nginx-test
spec:
  replicas: 10
  selector:
    matchLabels:
      service: http-server
  strategy:
    type: RollingUpdate
    rollingUpdate:
      maxSurge: 1
      maxUnavailable: 1
  minReadySeconds: 5
  template:
    metadata:
      labels:
        service: http-server
    spec:
      containers:
      - name: nginx
        image: nginx:1.10.2
        imagePullPolicy: IfNotPresent
        ports:
        - containerPort: 80
apply 新的 nginx.yaml
$ kubectl apply -f nginx.yaml --record
接下來介紹三種方式來進行滾動升級 (以升級 docker image 為例)
set image
# format
$ kubectl set image deployment <deployment> <container>=<image> --record
# example
$ kubectl set image deployment nginx nginx=nginx:1.11.5 --record
replace
修改 nginx.yaml 內的 image 版本
spec:
  containers:
  - name: nginx
    # newer image version
    image: nginx:1.11.5
    imagePullPolicy: IfNotPresent
    ports:
    - containerPort: 80
利用 replace 來進行升級而非 apply
# format
$ kubectl replace -f <yaml> --record
# example
$ kubectl replace -f new-nginx.yaml --record
edit
# format
$ kubectl edit deployment <deployment> --record
# example
$ kubectl edit deployment nginx --record
這指令會直接打開編輯器的視窗,讓我們來修改 deployment 內的設定值
# Please edit the object below. Lines beginning with a '#' will be ignored,
# and an empty file will abort the edit. If an error occurs while saving this file will be
# reopened with the relevant failures.
#
apiVersion: extensions/v1beta1
kind: Deployment
metadata:
  annotations:
    deployment.kubernetes.io/revision: "1"
    kubectl.kubernetes.io/last-applied-configuration: '{"kind":"Deployment","apiVersion":"extensions/v1beta1","metadata":{"name":"nginx","creationTimestamp":null},"spec":{"replicas":10,"template":{"metadata":{"creationTimestam
...
    spec:
      containers:
      - image: nginx:1.10.2
        imagePullPolicy: IfNotPresent
        name: nginx
...
$ kubectl rollout status deployment nginx
$ kubectl rollout pause deployment <deployment>
$ kubectl rollout resume deployment <deployment>
當升級完後同事發現此次的升級造成服務發生不穩定的狀況,但他們不見得清楚先前的設定檔的樣子。在這種狀況下,我們可以利用 rollback 來回復到先前的狀態。
在先前的操作過程中,大家可能會注意到指令後面多一個 --record 的參數,這參數主要是告知 Kubernetes 紀錄此次下達的指令,如此一來我們更能清楚不同的版本(revision)間做了什麼操作。
$ kubectl apply -f nginx.yaml --record
deployment "nginx" configured

$ kubectl set image deployment nginx nginx=nginx:1.11.5 --record
deployment "nginx" image updated

$ kubectl rollout history deployment ngin
deployments "nginx":
REVISION  CHANGE-CAUSE
1   kubectl apply -f nginx.yaml --record
2   kubectl set image deployment nginx nginx=nginx:1.11.5 --record
假設我們現在要回滾到 revision 1
# to previous revision
$ kubectl rollout undo deployment <deployment>
# to specific revision
$ kubectl rollout undo deployment <deployment> --to-revision=<revision>
# exmaple
$ kubectl rollout undo deployment nginx --to-revision=1
由於每次修改的設定皆會儲存在新增的 replicaset 中,因此我們可以利用 .spec.revisionHistoryLimit 來決定我們需要保留多久以前的紀錄 (此欄位需要在第一次建立 deployment 時就設定)
...
spec:
  replicas: 10
  selector:
    matchLabels:
      service: http-server
  strategy:
    type: RollingUpdate
    rollingUpdate:
      maxSurge: 1
      maxUnavailable: 1
  minReadySeconds: 5
  revisionHistoryLimit: 10
...
$ kubectl rollout history deployment/nginx
deployments "nginx":
REVISION  CHANGE-CAUSE
2   kubectl set image deployment nginx nginx=nginx:1.11 --record
3   kubectl set image deployment nginx nginx=nginx:1.11.5 --record
4   kubectl set image deployment nginx nginx=nginx:1.10 --record
5   kubectl set image deployment nginx nginx=nginx:1.10.2 --record
- 在
spec.template.metadata.labels加入 labels 的設定
The Deployment "nginx" is invalid.

* spec.selector: Required value
* spec.template.metadata.labels: Invalid value: null: `selector` does not match template `labels`
- http://kubernetes.io/docs/user-guide/deployments/
- http://kubernetes.io/docs/user-guide/kubectl/kubectl_rollout_history/
- https://youtu.be/wVMXjDoeRS4?t=3381
- http://kubernetes.io/docs/user-guide/kubectl/kubectl_rolling-update/
- http://kubernetes.io/docs/user-guide/replication-controller/
相關文章
- Kubernetes 兩步安裝一次上手
- Kubernetes Service 深度剖析 - 標籤對於 Service 的影響
- 從 Google Kubernetes Engine 移除節點
- Kubernetes Service 深度剖析 - 存取路徑差異
- Kubernetes Service 概念詳解
文章內容的轉載、重製、發佈,請註明出處: https://tachingchen.com/tw/
Twitter
Google+
Facebook
Reddit
LinkedIn
StumbleUpon
Pinterest
Email